
Stuffed shells with meat bring a comforting touch to the dinner table, enticing not just with their delicious flavors but also with their eye-catching presentation. These pasta delights, filled to the brim with savory meat and rich cheese, are sure to impress family and friends alike. The beauty of this dish lies in its versatility; you can easily switch up the filling to accommodate various tastes or dietary preferences. For a hearty twist, consider adding spinach or mushrooms for extra nutrients, or substitute traditional beef with turkey or a plant-based alternative for a lighter option.
To achieve perfect stuffed shells, make sure to cook the pasta al dente, allowing for a satisfying texture that holds up against the fillings. A well-seasoned sauce is your best ally—don’t shy away from herbs and spices to elevate the overall taste. With these expert tips and a dash of creativity, you’ll be well on your way to mastering this classic dish that’s as delightful to serve as it is to share.
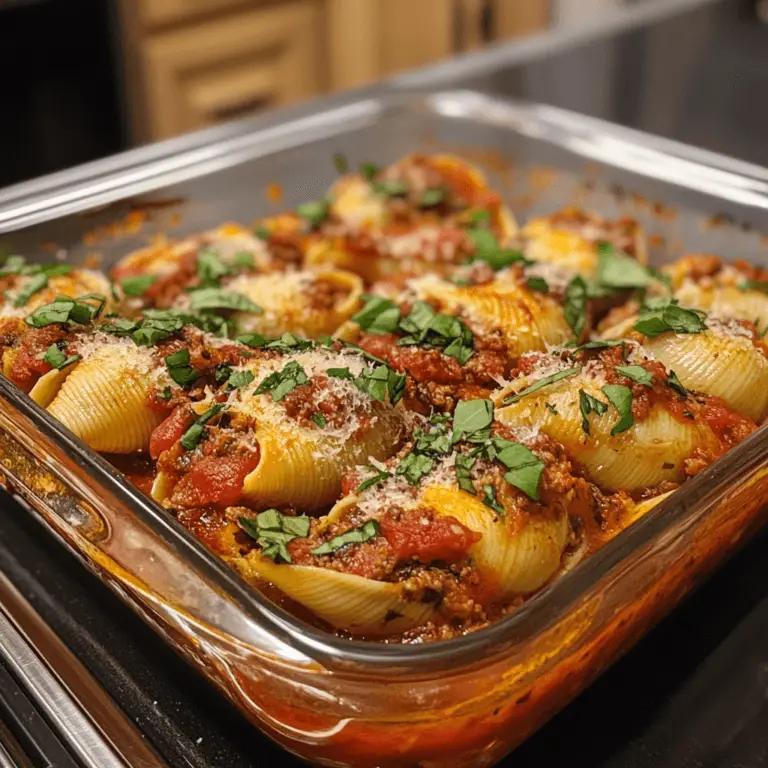
Delicious Stuffed Shells With Meat on a Plate
Ingredients for Stuffed Shells With Meat:
Pasta and Filling Ingredients
- 20 large jumbo pasta shells
- 1 pound ground beef (or Italian sausage for added flavor)
- 1 cup ricotta cheese
- 1 cup shredded mozzarella cheese
- ½ cup grated Parmesan cheese
- 1 large egg
- 2 cloves garlic, minced
- 2 teaspoons dried Italian seasoning
- Salt and pepper, to taste
For the Sauces
- 2 cups marinara sauce (store-bought or homemade)
- 1 cup shredded mozzarella cheese (for topping)
- Fresh basil leaves for garnishing (optional)
Cooking Ingredients
- Water (for boiling pasta)
- 1 tablespoon olive oil (to sauté the meat and garlic)
Optional Variations and Alternatives
- For a creamy twist, consider adding ½ cup of cream cheese to the filling mixture.
- Substitute ground turkey or chicken to make the dish lighter.
- Add 1 cup of finely chopped spinach to the filling for added nutrition and color.
- Spice things up by mixing in ½ teaspoon of crushed red pepper flakes if you enjoy a kick.
- Use a blend of mozzarella and provolone cheese for a deeper flavor profile.
Additional Notes
- Ensure the pasta shells are al dente to hold their shape during stuffing and baking.
- Let the stuffed shells rest for about 10 minutes after baking to set up before serving.
- To make ahead, prepare and stuff the shells, then refrigerate before baking. Add an extra 10 minutes to the cooking time if baking from cold.
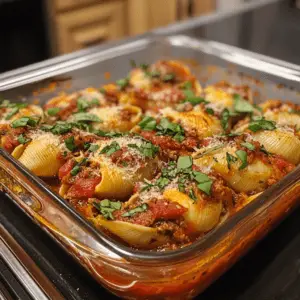
[BODY_IMAGE]
How to prepare Stuffed Shells With Meat:
Making stuffed shells is a delightful cooking adventure. Follow these simple steps for a delicious dish.
Gather Your Ingredients
First, collect all necessary ingredients. You will need jumbo pasta shells, ground beef, onion, garlic, ricotta cheese, mozzarella cheese, parmesan cheese, egg, marinara sauce, and seasonings. Make sure everything is fresh for the best results.
Cook the Pasta Shells
Begin by boiling water in a large pot. Once the water reaches a rolling boil, add a pinch of salt. Carefully place the jumbo shells into the pot and cook them for 8-10 minutes. You want them to be al dente, as they will cook more in the oven.
Prepare the Meat Filling
While the shells are cooking, heat a skillet over medium heat. Add finely chopped onion and minced garlic to the skillet. Sauté until they become fragrant and translucent, about 3-5 minutes. Next, add the ground beef to the skillet.
Cook the beef until it is browned and fully cooked. Drain any excess fat. Remove from heat and let it cool slightly, then transfer to a mixing bowl.
Mix the Filling Ingredients
In the bowl with the cooked beef, add ricotta cheese, half of the mozzarella cheese, grated parmesan cheese, a beaten egg, and your choice of seasonings, such as salt, pepper, and Italian herbs. Mix until all ingredients are combined well.
Stuff the Pasta Shells
After draining the shells, let them cool for a minute. Preheat your oven to 375°F (190°C). Then, take a spoonful of the meat mixture and carefully stuff each shell. Don’t overfill, as they can burst while baking.
Arrange in Baking Dish
Spread a thin layer of marinara sauce on the bottom of a baking dish. Place the stuffed shells seam-side up in the dish. Once all shells are arranged, pour the remaining sauce over the top. Sprinkle the remaining mozzarella cheese evenly.
Bake to Perfection
Cover the baking dish with aluminum foil to prevent drying. Bake in the preheated oven for about 25 minutes. Then, remove the foil and bake for an additional 10-15 minutes until the cheese is bubbly and golden.
Allow to cool for a few minutes before serving. Enjoy your homemade stuffed shells!
Tips for the Perfect Stuffed Shells With Meat
Use Quality Ingredients
To achieve the best flavor in your stuffed shells, start with high-quality ingredients. Fresh pasta shells give a tender bite. Always opt for fresh herbs when possible, as they enhance the overall taste. Use high-quality ground meat, whether it’s beef, pork, or turkey. If you’re a fan of cheese, try using a blend of ricotta, mozzarella, and Parmesan. This mix adds depth and richness to your filling.
Maintain Correct Temperature
Temperature is key for cooking stuffed shells properly. Ensure the meat is cooked thoroughly before assembly. Ground meat should reach an internal temperature of 160°F (70°C). If cooking the shells ahead of time, keep them refrigerated and only bake them when you’re ready to serve. Preheat your oven for even cooking. Using a thermometer can ensure your dish is perfectly done.
Suitable Substitutions for Dietary Restrictions
If you have dietary restrictions, don’t be afraid to make adjustments. For a gluten-free version, choose gluten-free pasta shells or even zucchini boats. Swap out ground meat for plant-based alternatives like lentils, mushrooms, or textured vegetable protein for a vegetarian option. You can also use dairy-free cheese to accommodate lactose intolerance. Always taste as you go when using substitutions to ensure flavor consistency.
Customize Your Filling
Feel free to make the filling your own. Add sautéed vegetables such as spinach, bell peppers, or mushrooms for added nutrition and flavor. Spices can also enhance the dish—consider adding garlic powder, Italian seasoning, or crushed red pepper for a kick. Mixing in some marinara sauce can keep the filling moist and delicious.
Perfect the Baking Process
To lock in the flavors, cover the baking dish with foil for the first 20-25 minutes. This helps the cheese melt and prevents the edges from burning. Remove the foil in the last 10-15 minutes for a beautifully browned top. Let the dish rest for a few minutes before serving. This resting time allows the flavors to meld and makes it easier to plate.
By applying these tips, you can elevate your stuffed shells experience and cater it to meet various preferences and needs. Enjoy your hearty meal with family and friends!
Storage Tips for Stuffed Shells With Meat:
Storing your stuffed shells properly ensures they maintain their flavor and texture. Follow these tips for optimal storage, freshness, and shelf life.
Cool Down Before Storing
After cooking, allow your stuffed shells with meat to cool to room temperature. Avoid leaving them out for more than two hours to prevent bacterial growth. Once cooled, move to the next step for better preservation.
Choose the Right Storage Container
Select an airtight container or a heavy-duty freezer bag. If using a container, ensure it is large enough to prevent crushing the shells. For bags, expel as much air as possible before sealing. This choice directly impacts freshness.
Refrigeration for Short-Term Storage
If you plan to eat the stuffed shells within three to five days, store them in the refrigerator. Keep the temperature at or below 40°F (4°C). Placing them on a middle shelf minimizes temperature fluctuations.
Freezing for Long-Term Preservation
For long-term storage, consider freezing your stuffed shells. They maintain their best quality for about three months in the freezer. Ensure they are tightly sealed to avoid freezer burn. For added convenience, freeze them in smaller portions, allowing for easier reheating.
Thawing and Reheating Safely
When you’re ready to enjoy your stuffed shells with meat, thaw them in the refrigerator overnight for the safest method. You can also use the microwave for quicker options, but be careful not to cook them further. Reheat them in the oven at 350°F (175°C) until the internal temperature reaches 165°F (74°C) for safe consumption.
Keeping Track of Shelf Life
Label your containers or bags with the date of storage. This practice helps you monitor freshness. Use the stuffed shells within the recommended time frame. This way, you can ensure optimal taste and safety.
By following these simple storage tips, you can enjoy your savory stuffed shells with meat later without losing taste or quality.
Related Recipes to Enhance Your Meal with Stuffed Shells With Meat
If you love stuffed shells with meat, several other dishes can complement your dining experience beautifully. Here are some fantastic choices that share similar ingredients or flavor profiles.
First, consider Baked Ziti. This recipe features pasta, meat, and cheese, much like stuffed shells. Instead of filling pasta, you mix cooked ziti with rich marinara sauce, ground meat, and gooey mozzarella cheese. This dish bakes in the oven, developing a crispy top layer while staying creamy inside. It offers a different presentation but similar comfort, making it a great option for family gatherings.
Another excellent match is Lasagna. Lasagna layers pasta sheets, seasoned meat, ricotta cheese, and marinara sauce. While it requires a bit more assembly than stuffed shells, the hearty flavors make it a beloved classic. This dish is ideal for meal prepping too, as it stores well and tastes even better the next day.
Lastly, don’t overlook Manicotti. This dish uses large pasta tubes filled with a savory meat and cheese mixture, just like stuffed shells but with a different shape. The sauce and cheese melt beautifully during baking, offering a delightful texture contrast.
Adding these recipes to your meal rotation provides variety while maintaining that same warm and hearty vibe you love. Each dish enhances your dining experience with familiar flavors, making them perfect companions for stuffed shells.
Frequently Asked Questions:
What is the origin of stuffed shells?
Stuffed shells originated in Italy, where the custom of filling pasta with various ingredients began. Variations of this dish have proliferated in Italian-American cuisine, often featuring rich fillings including meat, cheese, and vegetables. This hearty meal has become popular in households, thanks to its comfort and ability to be made in large batches.
What kind of meat can I use for stuffing shells?
You can choose a variety of meats for your filling, including ground beef, sausage, turkey, or chicken. Each type brings a unique flavor profile. For a more indulgent version, combining meats, such as beef and pork, can provide a richer taste. Vegetarian options might include mushrooms or a blend of vegetables if you prefer a meatless alternative.
Can I prepare stuffed pasta shells ahead of time?
Yes, preparing your filled pasta shells in advance is a great time-saver. Assemble them and then store them in the refrigerator for up to 24 hours or freeze unbaked shells for longer storage. Just be sure to adjust your baking time if using them directly from the freezer.
What sauce is best for meat-filled shells?
A classic marinara sauce complements stuffed pasta beautifully, though you might also enjoy a creamy alfredo or a spicy arrabbiata. The choice of sauce is a matter of personal preference; for a rich experience, consider layering flavors with both a marinara base and a cheese topping.
How do I prevent the shells from breaking during cooking?
To ensure your pasta shells stay intact, cook them just until al dente rather than fully soft. Gently handling them when filling and baking can also help maintain their shape. Additionally, a quick rinse in cold water after boiling can cool them down and prevent sticking.
Can stuffed shells be frozen after baking?
Absolutely! Baked stuffed shells are freezer-friendly. Allow them to cool completely before transferring them into airtight containers. Properly stored, they can last for up to three months. When ready to eat, simply reheat in the oven until bubbly and hot.
Conclusion:
Stuffed shells with meat are a fantastic option for quick weeknight dinners or gatherings, offering a blend of simplicity and robust flavors. This versatile dish allows for easy customization; whether you prefer ground beef, turkey, or even a meat substitute, the choice is yours. Don’t hesitate to explore different cheeses and sauces, as these can elevate your dish and cater to various tastes. The straightforward preparation method ensures that even novice cooks will find success, making it an ideal recipe for all skill levels. Remember, the beauty of stuffed shells lies in their flexibility—feel free to add in vegetables or herbs to enhance the nutritional value and presentation. By using these adaptable tips and techniques, you can create a delightful dish that suits your preferences, making stuffed shells a beloved staple in any kitchen.